1
Download Clash Verge
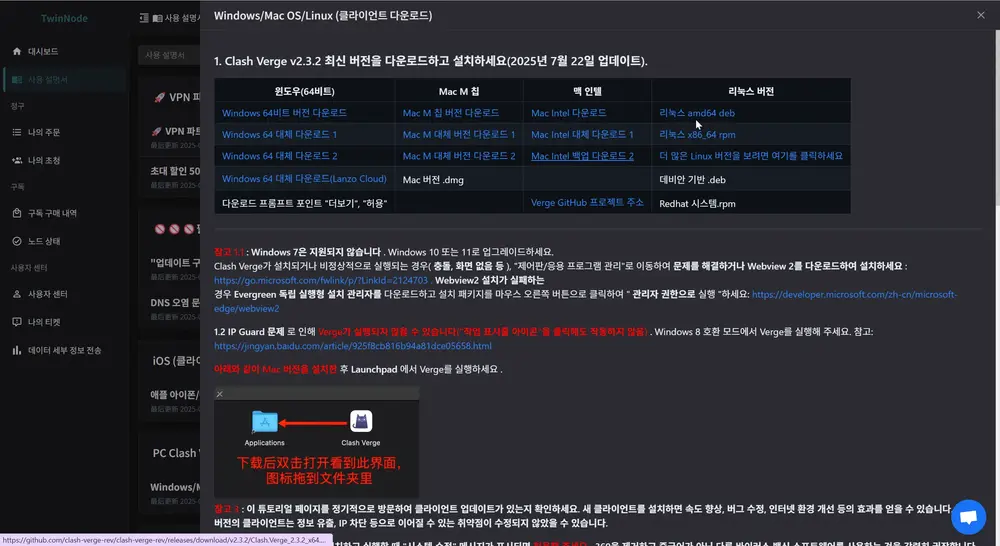
Choose one of the links below to download the Clash Verge installer for Windows 64-bit. Use whichever link is fastest.
- Clash Verge v2.4.7 (Windows 64-bit)GitLab Direct
- Clash Verge v2.4.7 (Mirror)gh-proxy mirror
- Clash Verge v2.4.7 (GitHub)GitHub Official
Windows 7 is not supported. Windows 10 or 11 is required. If your browser displays a security warning during download, click "More" → "Keep".
2
Run the Installer
Double-click the downloaded Clash.Verge_2.4.7_x64-setup.exe file to start installation.
- When the setup wizard opens, click Next → Install.
- Once finished, click Finish.
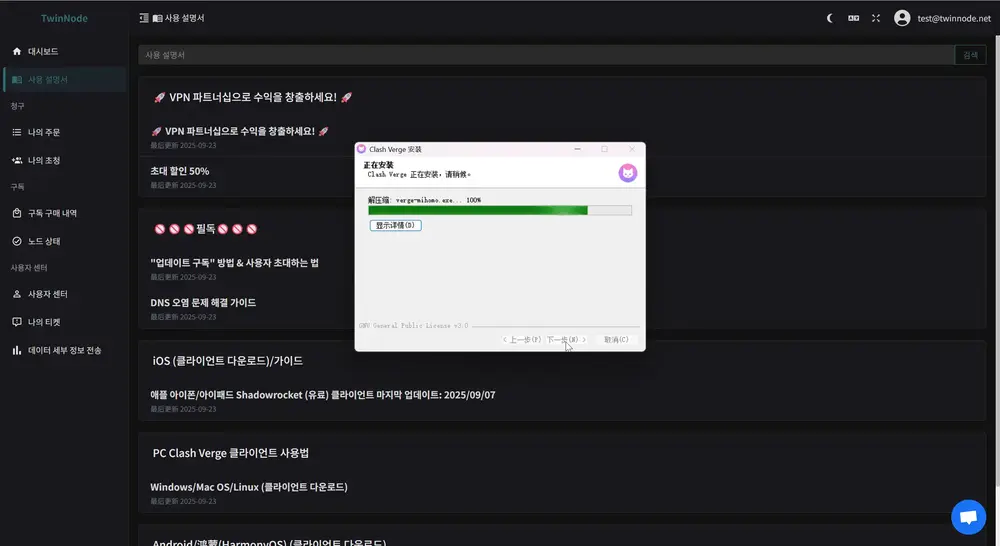
If 360 or other security software shows a "System Change" warning, click Allow All. We highly recommend uninstalling common Chinese anti-virus programs.
If the app closes immediately or fails to display after installation, you may be missing Webview2. Download Microsoft Webview2 and try again.
3
Run · Import Subscription · Connect
① Launch Clash Verge
Find Clash Verge on your desktop or in the Start menu and launch it. If a Windows Firewall popup appears, click Allow Access.
In some corporate environments with IP Guard, the tray icon might not respond. Right-click the Clash Verge executable → Properties → Compatibility → Set to Windows 8 compatibility mode and try again.
② Copy NodeNow Subscription URL
To connect with Clash Verge, you need your NodeNow subscription URL.
- Log in to NodeNow Account Center.
- Go to the My Subscriptions menu.
- Click the Copy Subscription (Universal) button to copy the URL to your clipboard.
Subscription URLs contain sensitive account information. Do not share them with others.
③ Import Subscription
Return to the Clash Verge app and import your subscription.
- Click the Profiles tab in the left sidebar.
- Paste the copied URL into the input field at the top.
- Click the Import button.
- Click the newly added profile to activate it. A green checkmark will appear next to it.
Right-click your profile and enable Auto Update to keep server lists current. An interval of 12-24 hours is recommended.
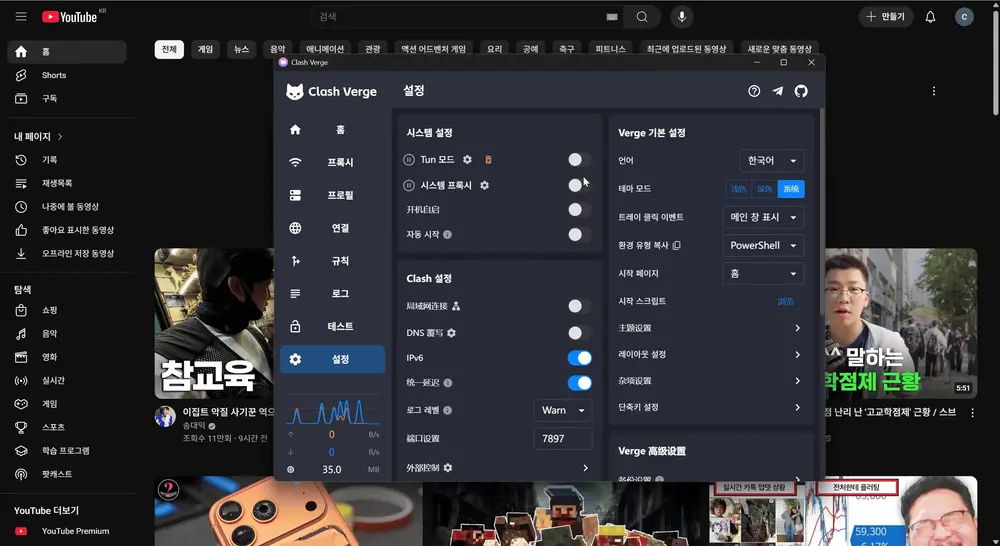
④ Enable System Proxy & Verify Connection
Go to the Dashboard tab in the left sidebar.
- Toggle System Proxy to ON.
- Confirm the connection by visiting a site that was previously blocked.
If certain sites still won't open, change the proxy mode to Global. If issues persist, try switching to a different server node.
4
Select Proxies
Click the Proxies tab in the left sidebar.
- Select a proxy mode at the top:
- Global — Routes all traffic through individual servers
- Rule — Applies smart routing based on site rules (Recommended)
- Select your preferred node from the server list.
- Click the speedometer icon (Ping Test) to measure response times and choose the server with the lowest latency.
